I want to connect to a remote MySQL server to verify email addresses from my MySQL database. Please help.
To connect to a remote MySQL server from the Advanced Email Verifier, follow the steps below:
Step 1. Install MyODBC Driver.
Download MySQL Connector/ODBC 32-bit (.msi file) to your desktop.
After downloading, double click on the .msi file.
When the MySQL Connector/ODBC – Setup Wizard window appears, click Next.
Select the Typical installation and click Next.
Click Install and wait for the installation to finish. Click Finish.
After the MySQL Connector/ODBC is successfully installed, you must allow the computer where the Advanced Email Verifier is installed to access your MySQL database by adding its IP address to the list of allowed hosts for your MySQL database.
Step 2. Add MySQL Access Hosts.
Open your Internet browser.
Open the cPanel on the remote web server where your MySQL database is located.
Click on MySQL Databases link.
Scroll down the page and find Access Hosts section.
Enter the IP address of the computer where the Advanced Email Verifier is installed.
Click Add Host.
Close your browser.
Now you must create a user DSN for MySQL driver in the ODBC Data Source Administrator.
Step 3. Create User DSN for MySQL Driver.
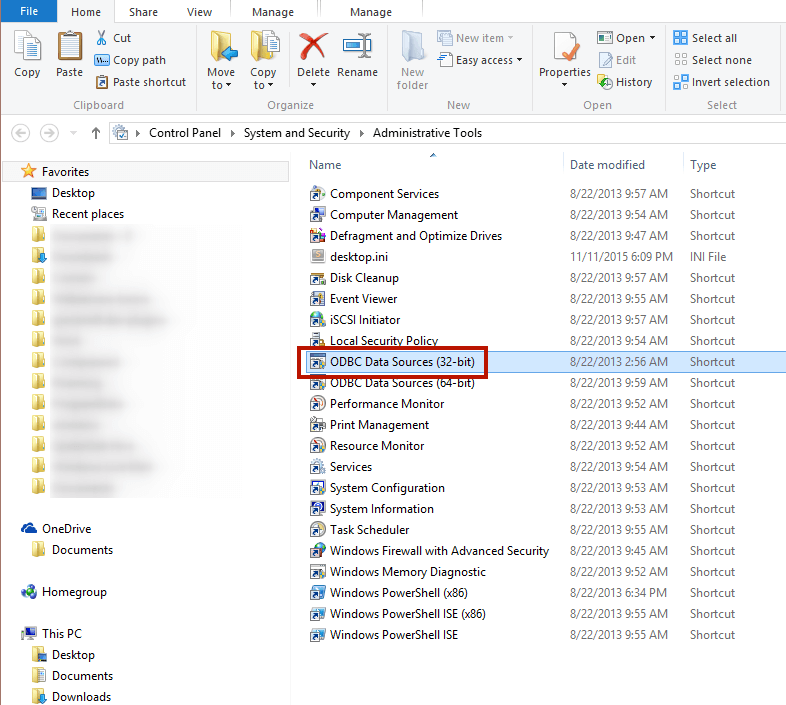
Click Start -> Control Panel -> System and Security -> Administrative Tools.
Double click the mouse on ODBC Data Sources (32-bit).
On ODBC Data Administrator (User DSN tab) click Add.
Select MySQL ODBC 5.x Unicode Driver.

Click Finish.
On the Connector/ODBC screen type Data Source Name, your MySQL server name, your username and password to connect to MySQL server, and your MySQL database name.
If you are connecting to a local MySQL database, enter localhost as the TCP/IP server, your username, password and select the database.
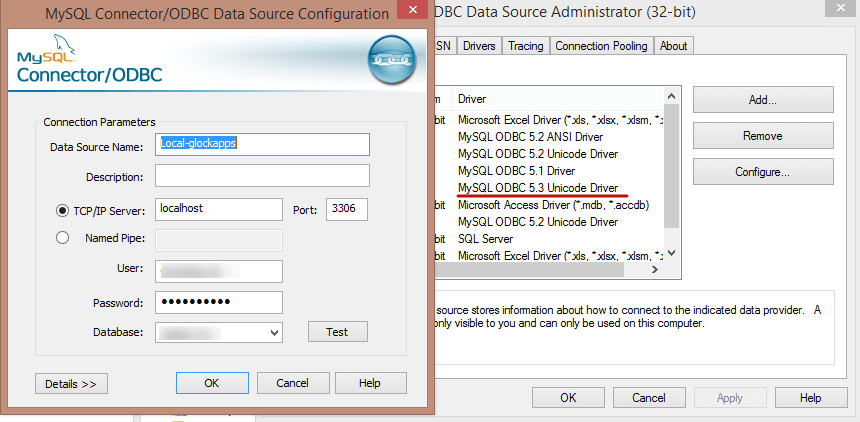
Click Test.
Click OK if the test passes.
Click OK to close the Connector/ODBC screen.
Click OK to close the ODBC Data Source Administrator screen.
Now you are ready to connect to your MySQL database from the Advanced Email Verifier.
Step 4. Connect to MySQL Database from the AEV.
Open the Advanced Email Verifier.
Click on My Databases at the left pane.
Click on New on the menu bar.
Type a name for your database link.
Click Select Database button.
On the Data Link Properties screen clic on the Connection tab.
Select your data source name.
Click on Test Connection button.
Click OK if the test passes.
Click OK to close the Data Link Properties screen.
On the Database Manager screen select the Table Name from your MySQL database.
Map the fields from your MySQL database to the respective fields in the Advanced Email Verifier. To do this, click the mouse in the Mapped Field column and select a field name. The Email, Status and VerificationResult fields are required for mapping.
Click OK to save the settings.
Success! To see how the data from your MySQL database is displayed in the Advanced Email Verifier, put the cursor on your database name in My Databases section at the left pane.
Interested? Learn more about our Advanced Email Verifier software.