Can I set up EasyMail7 to work with the Verizon SMTP settings?
Yes, if you have an email account with Verizon, you can configure the EasyMail7 in-house email software to use the Verizon email settings to send email newsletters and other types of emails to your subscribers.
Verizon SMTP Settings for EasyMail7
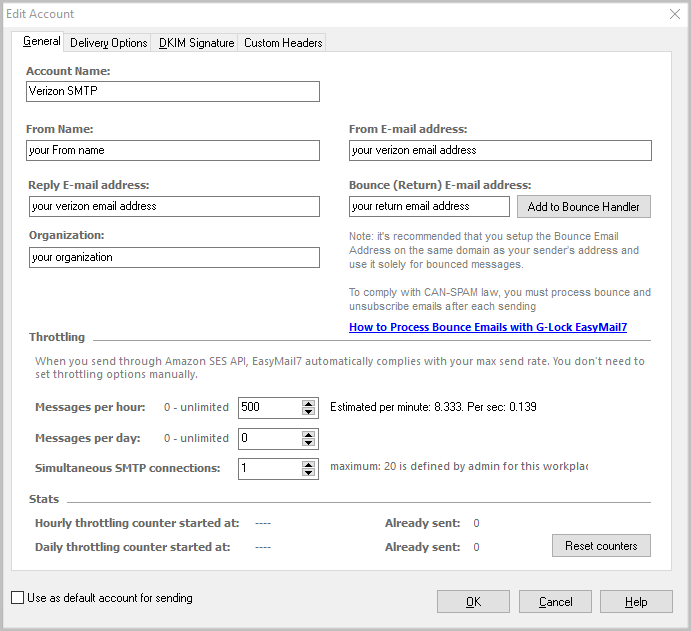
Go to EasyMail7 Settings -> Email Accounts -> Add New.
Under the General tab, add your sender information – From Name, From email address (your Verizon email), Reply-To address, Bounce (Return) email address, and optionally organization.
The From Name and From Email are what will appear in the From field of the emails that you send.
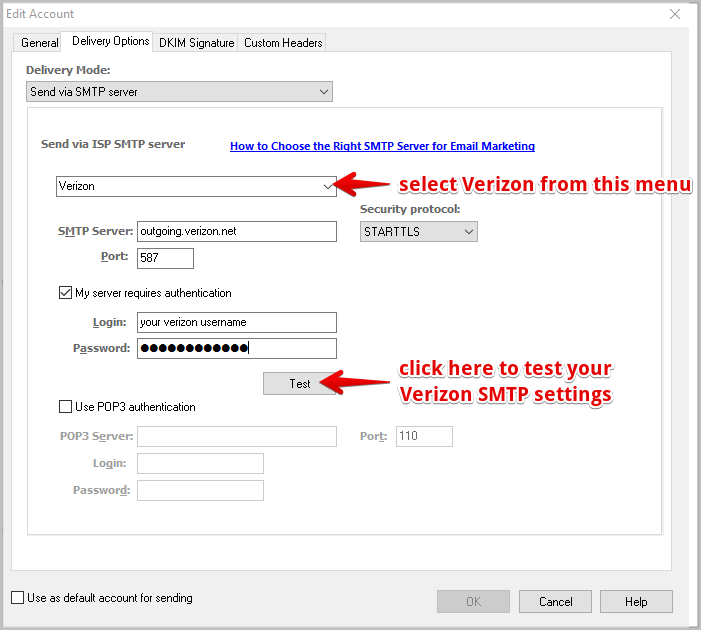
Go to the Delivery Options tab in the settings.
Choose Verizon from the list of pre-defined SMTP servers.
The SMTP settings will be pre-filled:
SMTP Server: outgoing.verizon.net
Port: 587 or 465
Security Protocol: STARTTLS for the port 587 or SSL for the port 465
Check the “My server requires authentication” checkbox.
Enter your full Verizon email address as the login and your password of the Verizon user.
Click the Test button and send a test email to make sure that your Verizon SMTP settings are working.
If the test email is sent, click OK to save the email account.
Verizon Email Sending Limits:
– 100 recipients per email (if using Bcc:)
– 500 emails per hour
Verizon IMAP Settings for EasyMail7
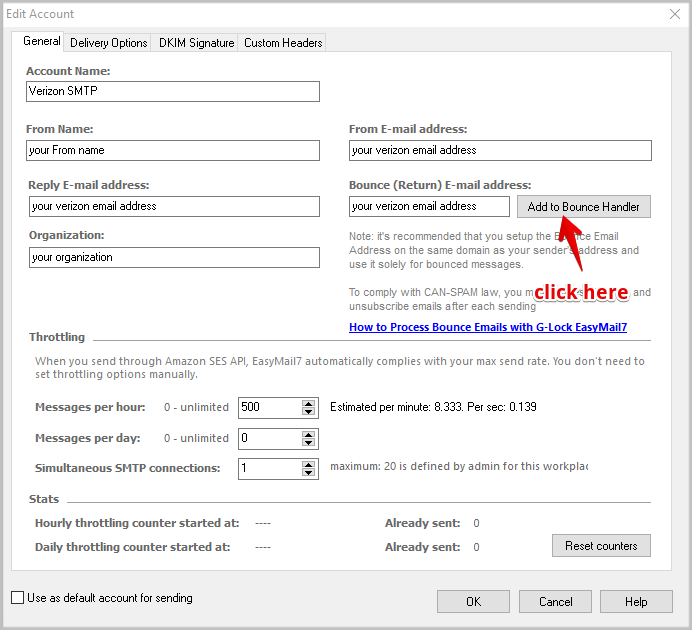
It’s important that you set up the EasyMail7’s Bounce Handler for processing bounce emails.
If you are using your Verizon account to receive bounces, enter the below IMAP settings in the EasyMail7’s Bounce Handler.
Click the “Add to Bounce Handler” button under the General tab in your email account.
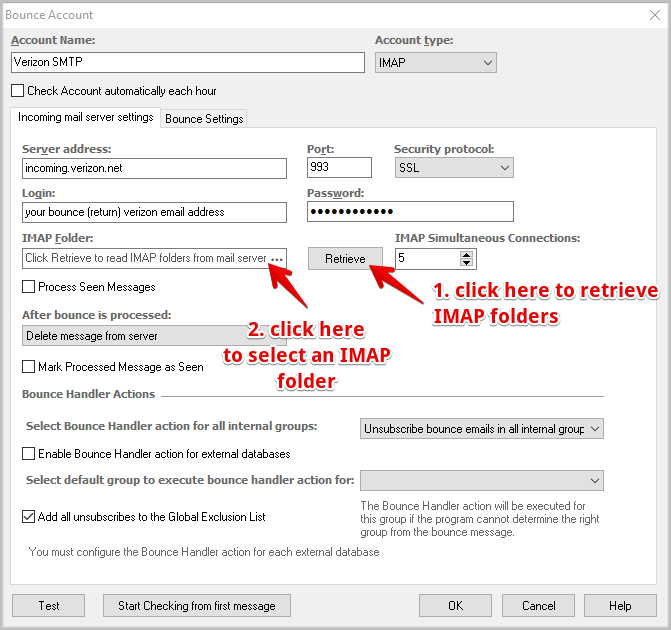
Enter the Verizon IMAP server settings as below:
Account name: any name for your bounce account (it will show in EasyMail7 only)
Account type: choose IMAP
Server address: incoming.verizon.net
Port: 993 with SSL
Login: your full bounce (return) email address (should be pre-filled)
Password: your password for your bounce (return) email account
Click “Retrieve” to retrieve the IMAP folders and then choose the IMAP folder to process bounce emails from. Typically, it’s Inbox.
Choose the options what to do with bounce messages and click OK.
Now you are done and you can send more emails, faster and better. Learn more about our EasyMail7 email marketing software and spam testing tool.