How to Use Amazon SES SMTP Server with EasyMail7
In addition to using the Amazon SES API, you can use the Amazon SES SMTP settings in EasyMail7 to send emails. You can choose yourself which method works best for you.
If you don't have an account with AWS yet, create an account following the steps in this tutorial.
Then follow the steps below to integrate EasyMail7 with the Amazon SES SMTP interface:
Step 1. Create Your SMTP Credentials with Amazon SES
To send emails through the Amazon SES SMTP interface, you must create SMTP credentials — a user name and a password.
To create your SMTP credentials:
Login to your AWS account, click on “Account” and select "AWS Management Console".
Type SES in the search field and then select SES from the menu.
Click on "SMTP Settings" at the left side.
Click on "Create My SMTP Credentials".
Enter your SMTP user name [this user name will be used to identify you in the Amazon AWS panel only].
Click Create.
A password and a user name for SMTP will be generated for you.
Copy your credentials or click on "Download Credentials" because you won't be able to view your SMTP password again.
After you created your SMTP credentials, you can configure G-Lock EasyMail7 to send emails through the Amazon SES SMTP interface.
Step 2. Configure EasyMail7 to Use Your Amazon SES SMTP Credentials
Open G-Lock EasyMail7.
Go to "Settings -> Email Accounts".
Click "Add New".
Enter your user information under the General tab.
The "E-mail Address" and "Bounce (Return) E-mail Address" must be verified with Amazon SES.
Click on the Delivery Options tab and enter the SMTP settings:
Delivery Mode: Send via SMTP server
Server Name: email-smtp.us-east-1.amazonaws.com
Port: 465
My server requires authentication: Yes
Login: your SMTP login
Password: your SMTP password
Security Protocol: SSL
*Though on their website Amazon SES says to use the "Use Transport Layer Security (TLS)" connection, in G-Lock EasyMail7 you need to select the SSL security protocol.
After you enter the SMTP settings, click Test to test your email account.
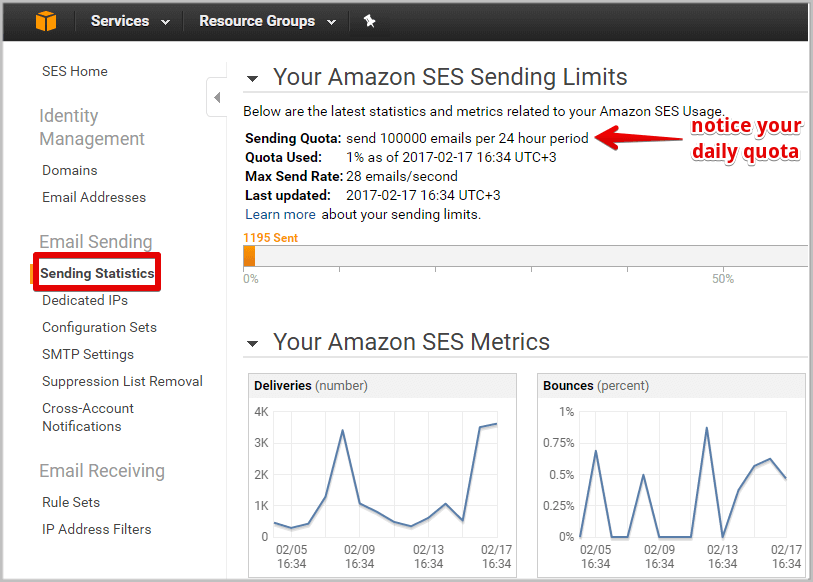
Before you can send the email, you must ensure that G-Lock EasyMail7 will not exceed your daily quota and max send rate allowed by Amazon SES for your account.
You can check your 24-hour sending limitation in your AWS account under Sending Statistics.
Now go to the General tab in the EasyMail7’s email account settings.
Enter your 24-hour limit into the Messages per hour field. The program will automatically calculate the number of messages per second (your max send rate).
Click OK to save the email account.
Now you can create the email, select your account with the Amazon SES SMTP settings in the From field and send the message to the group.
For a faster sending speed, you can launch an Amazon EC2 instance and use EasyMail7 on the instance.
Amazon SES Email Sending Best Practices Whitepaper
Amazon SES system tracks each customer’s bounce, complaint, and content metrics in order to improve inbox delivery for all Amazon SES customers. For further details about each of these metrics and tips on how to improve them, please see the Amazon SES Email Sending Best Practices Whitepaper.


